but its sooooooo pretty...

We all know Locked up has the best hardware out there, it is consistent, even threads, and comes in more sizes and colors than ever! Yet if you are like me, you still get nervous and go through the tedious task of assemble, then re assemble...
What if there was an easier way? What if the answer was simple? what if I told you that doing all that stuff above isn't necessary and you too could have all this hardware that can best be described as scale jewelry on your rig without those fears?
Well, I will admit my boneheaded move and share with you all so you can do just that. I figure if I was still doing this there might be someone else out there doing the same..
The answer is in the tools we are using to install it. The more I thought about it, the more it made sense.. I had all this money in my rig, only the best parts, and the best hardware, and I was still holding on to these cheap low tech and low buck tools to install it. Maybe you too have seen some of these options, maybe you are using them too.

I have used these for years, and at first it was because we had too. and the result was always the same, at least one screw ended up looking like this;

OK so maybe that screw met these tools, but to be honest I shouldn't expect much better out of the above "tools" either. They were all the wrong tool for the job.

Fortunately for us, LURC has the answer right in front of us. I was currently rebuilding a few rigs, and wanted that scale hardware that everyone else was enjoying. So I bit the bullet and ordered the hardware. BUT this time I also ordered the RIGHT tool for the job. 2mm and 3mm extended tip hex socket drivers. You can find them here;
http://www.lockeduprc.com/2mm-Hex-Socket-Driver-tip--Extended-_p_542.html
http://www.lockeduprc.com/3mm-Hex-Socket-Driver-tip--Extended-_p_639.html
It did add a little expense to my order, but I think you will agree with me soon, it was far worth it. While you are at it, grab one of these tool handles too. More on that later..
http://www.lockeduprc.com/Tool-Handle_p_293.html
So my hardware and shiny new hex drivers arrived and I was eager to get started, I originally started by using one of my Dynamite tool handles and that worked well. They are one of my favorite handles, and I was happy that the tips fit. But swapping tips back and forth quickly became annoying, and they wouldn't fit in my tool drawer due to their length. So I ordered the above tool handle (see I am stubborn and apparently cheap) learn from me and just order both first.

Instantly I could tell the error in my previous ways, and why my pretty scale hardware always looked like I installed it in a garbage disposal. They say a picture is worth a thousand words, so here is a couple thousand for you.


the tool I was using isn't even centered, let alone tight on the hardware, so its no wonder I was stripping screws or having to install and re-install as mentioned above. The locked up tool fit tight, and has a precision fit and finish. So much so that the screw fits nice and snug (this also makes assembly WAY easier) you ever drop a m2 screw? forget it, its gone!

Back to that tool handle.. A couple days later that came, and again quickly realized the thought that was put into this piece, and it became apparent that I should have just ordered that up front too.
it is a good quality piece, with a nice anodized finish, knurled grip and a flat machined in so it is not constantly rolling off your table.
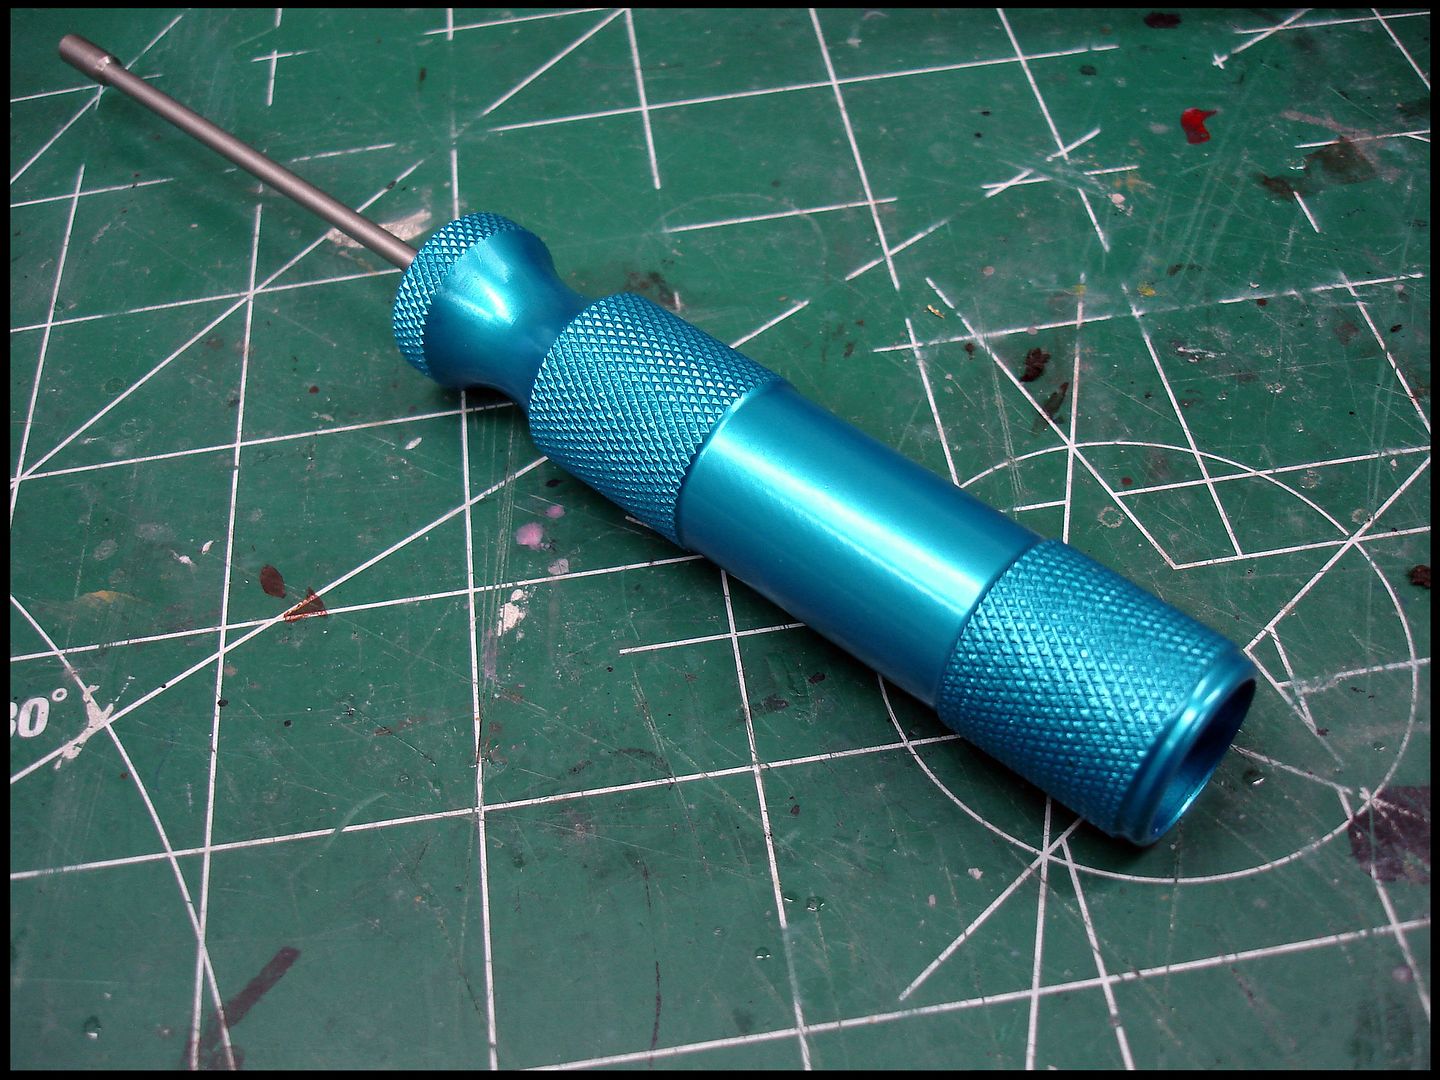
But best of all, I don't have to swap tips back and forth, AND IT DOES THIS!

the tool is hollow on the back so you can store the tip in the handle itself! perfect for storage in that drawer it wouldn't fit in, or in your trail pack!
The end result was using quality tools allowed me to install Locked Up hardware in a multitude of different parts, WITHOUT having to first install regular hardware, and I am happy to report I did not strip one single screw! Just take a look at this and try to tell me you want to use a standard screw on your next scale build! Learn from my mistakes if you haven't already and order Locked Up tools with your next order.